
Tutorial: Drawing to a Functional SwiftUI Prototype in < 5min
Ideate on a whiteboard and turn it into an app.

We launched a new feature on Trace recently, where you can Draw a low-fidelity mockup on a whiteboard and generate a fully functioning prototype, written in Swift UI within minutes. In this post, I’m demonstrating the draw feature by making a simple to-do list app.
Here’s a video of the final app running on my phone:
I started building this by drawing out a low-fidelity mockup of the app on the Excalidraw whiteboard on Trace.
In the image below, you can see the basic to-do list app layout. The text & arrows in red represent annotations. They’re added to help the AI understand what different elements in the mockup do.
(The AI automatically understands not to include any red colored text or arrows in the actual prototype as they’re meant to be annotations)
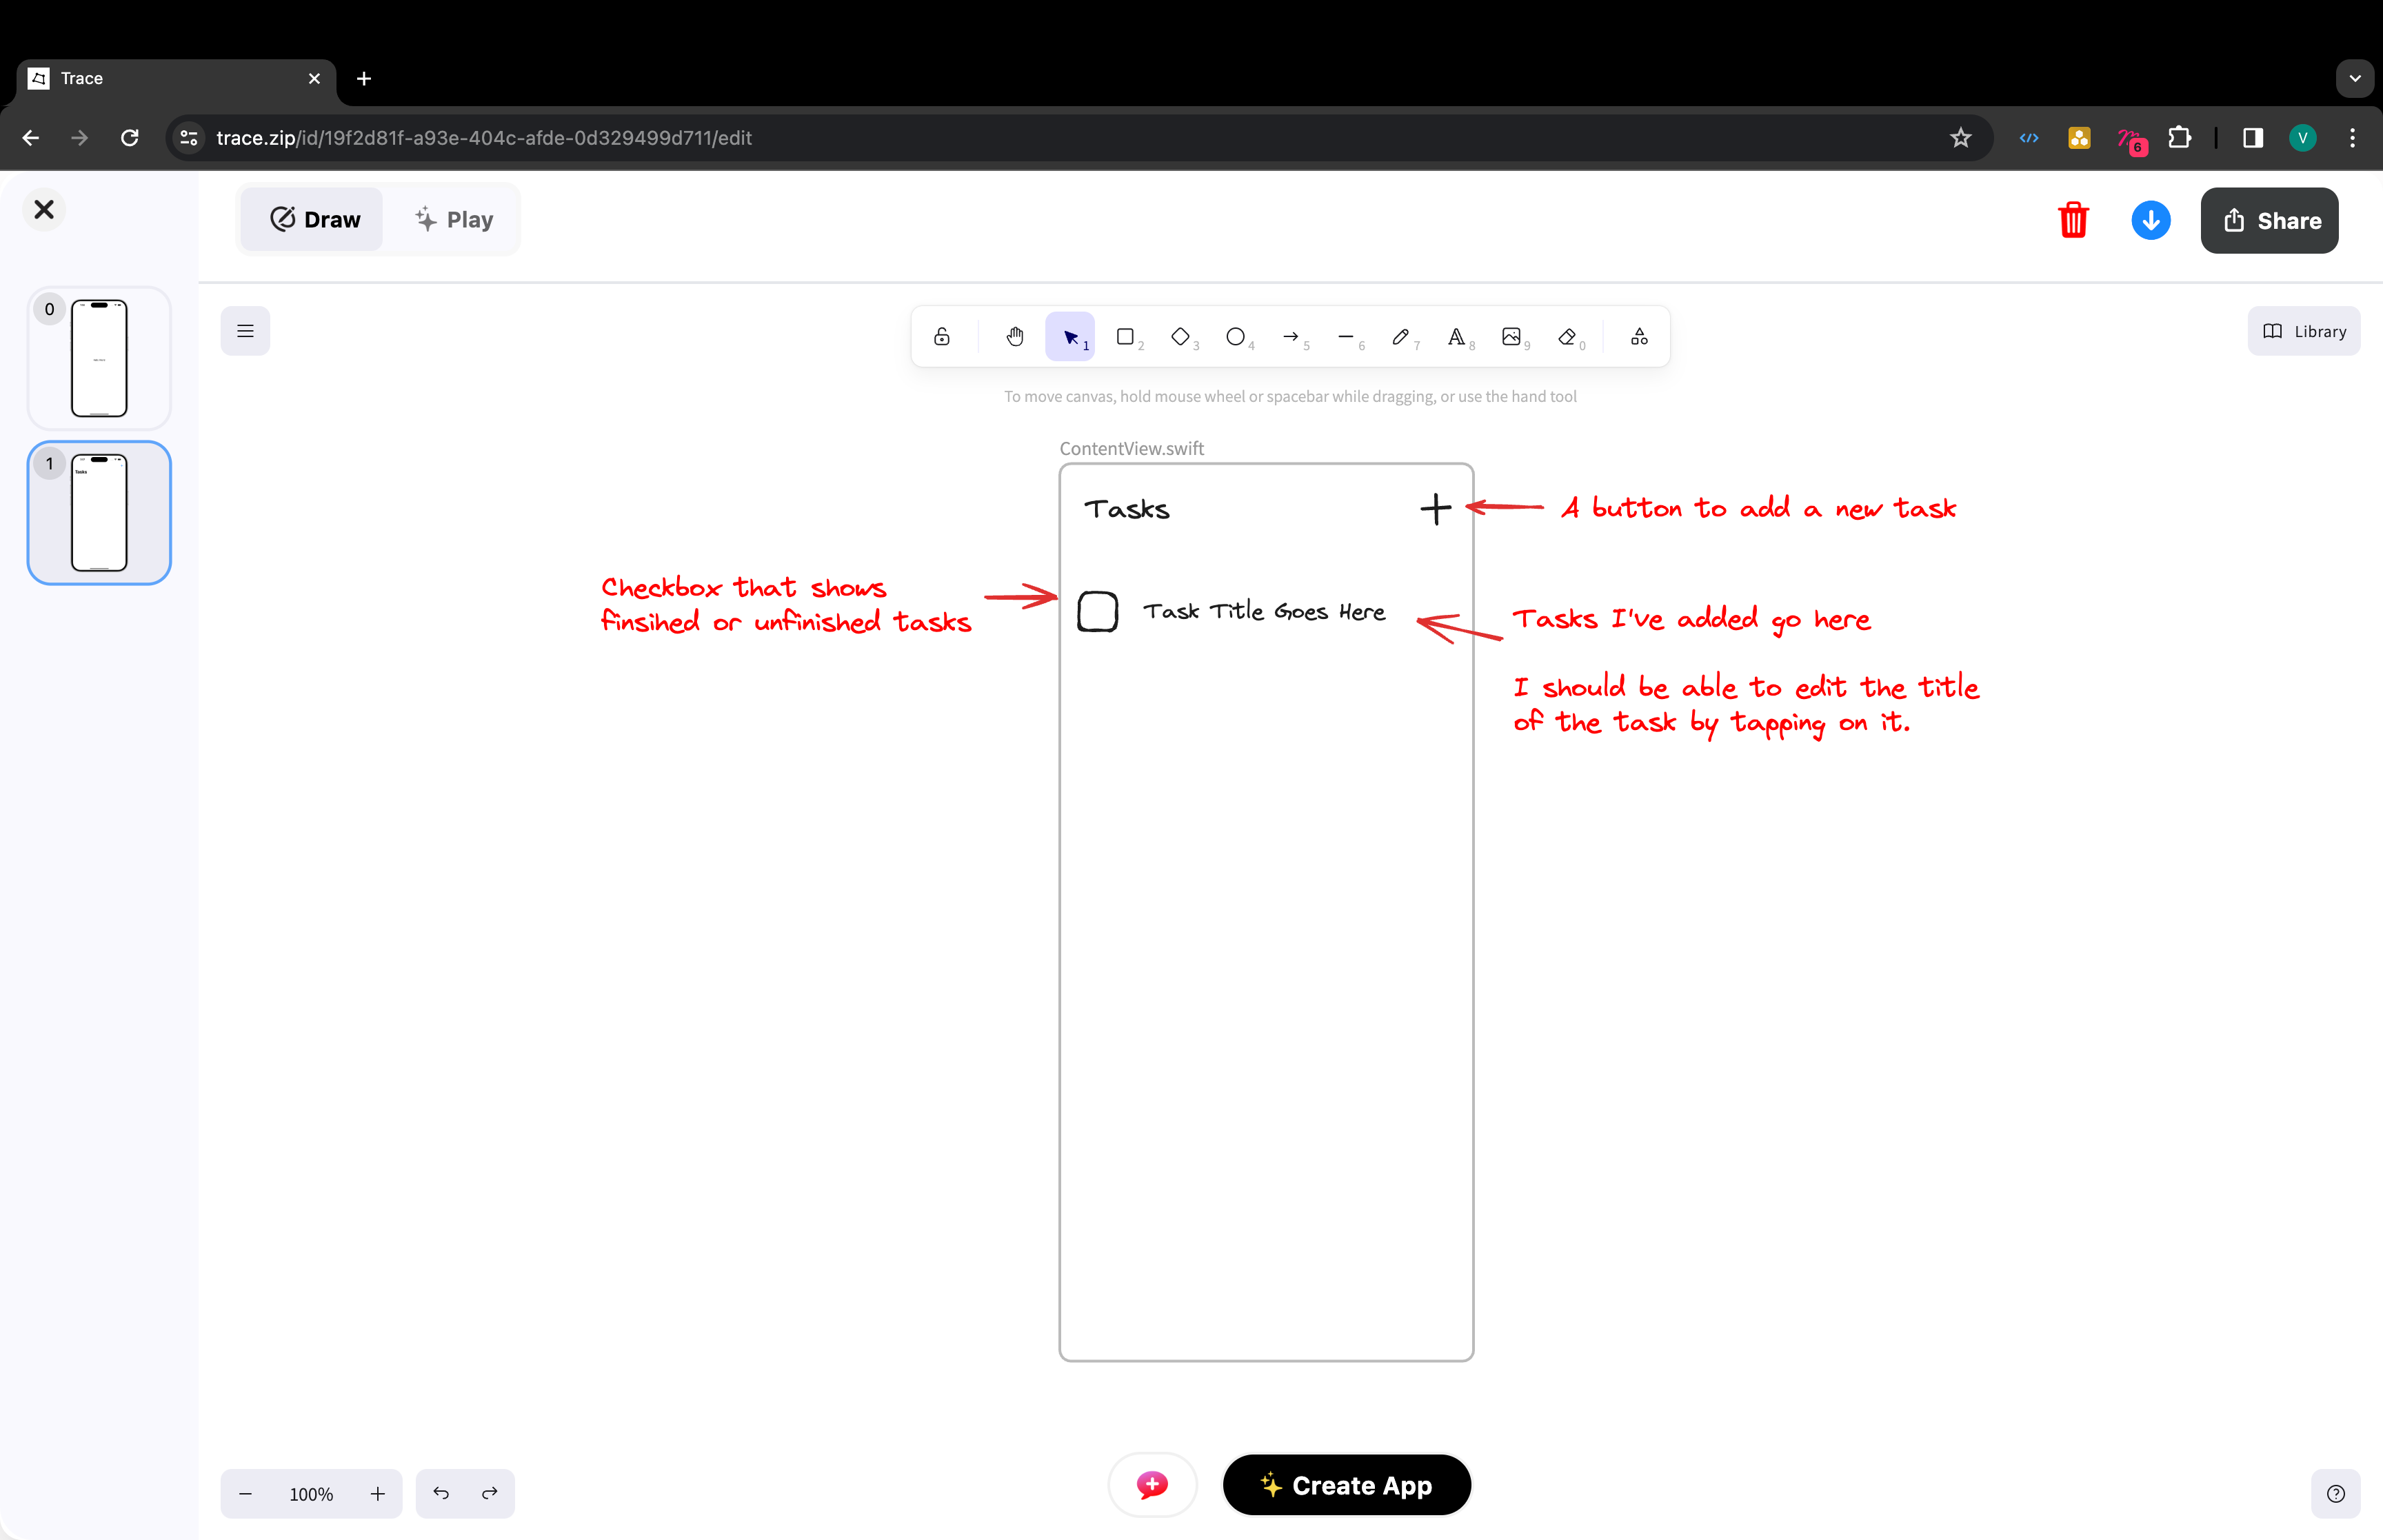
This is a whole new way of prompting AI where the position on the whiteboard adds a whole new layer of spatial context that can’t be conveyed with just text. While prompting, it’s important to keep in mind that you want to be as clear and less ambiguous as possible.
Once I’m satisfied with my mockup, I tap on generate. Trace automatically switches to play mode where I can see the finished app running in my browser. I can easily interact with it to test if it’s exactly what I want. As you can see, it’s exactly what I initially envisioned:
I can also tap on the Code button on the top right corner of the screen to see (and even edit) the code that the AI just generated. I go through the code in the video below:
You can also checkout this youtube tutorial that documents the entire process of creating this simple app from whiteboard mockup to finished prototype.
Hope this was helpful, we’re excited to publish more tutorials in the future to help you build apps faster.
Cheers,
Trace Team